This section of the guide is out of date.
Freedom2Roam has now been released and replaces RAv3. Guidance on configuring Freedom2Roam is available here.
A newly created group initially contains no members and is not yet configured for use. It will need to have users added into it and the security level set.
The members of a group should be people who will have access to the same resources (ie their desktop and/or a share on the server) and will have the same security criteria applied to them upon logging in.
People who need different levels of access should be placed in different groups.
To define who will be in a group click Select to the left of the group name.

The group settings will open (below the DNS settings box, at the bottom of the web page).
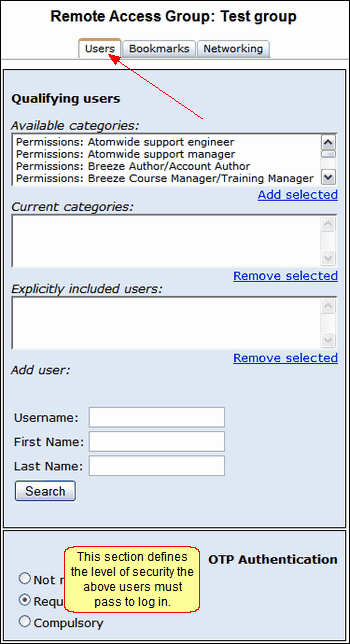
The Users tab will be selected by default. This is where you can select groups of users or individuals to add to the selected remote access grouping.
Add groups of users
The Available categories field contains users grouped by USO profile settings such as: Permissions, staff Role, Subject and Year Group/Key Stage.
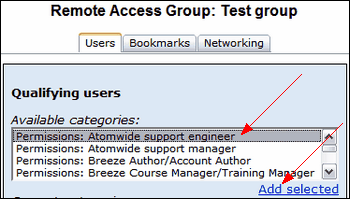
To add groups of users, scroll through the list of available groups and click on one category at a time.
When a category is highlighted, click the Add selected link below the Available categories box.
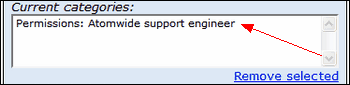
The group you have selected will now appear in the Current categories box.
If you need to remove a group that has been added, click on that group in Current categories and click Remove selected.
As many groups as necessary can be added in this way.
Add individual users
Use the Add user part of the interface to add specific individuals to a remote access group.
To add individual users you can search for them either by Username (with or without the 3-digit LA suffix) or by First and/or Last name.
If the user is found, click on the Add user link in the left-hand column to add the user to the group.
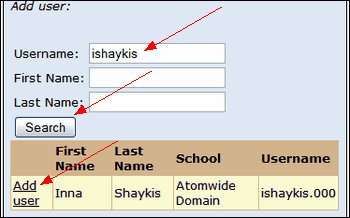
The user will appear in the Explicitly included users box. Once the user's name has appeared in this box, that person is included within the group. There is no further option to Save the group. It is saved automatically by the act of adding users.
All the individually added users will be listed in the Explicitly included users section.
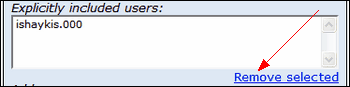
To remove a user that has already been added, select the user's name by clicking on it to highlight it and click Remove selected directly below the box.
See next:
Define authentication requirements
See also: