This section of the guide is out of date.
Freedom2Roam has now been released and replaces RAv3. Guidance on configuring Freedom2Roam is available here.
In schools where Windows-based machines are given to staff for working at home, it is possible to pre-configure the machines to connect directly to the school's network via a VPN even before the user has logged into Windows.
After the secure connection is established, each user will be able to log in directly to the school's domain rather than the local machine. This will enable any login scripts to run, mapped drives to be connected etc.
Supported operating systems include Windows Vista, Windows 7 and Windows 8.
Each device will need to be locally configured by the school's Nominated Contact.
Enabling pre-login functionality
To enable this feature, the Nominated Contact must go to Service Desk >> Remote Access resources in the USO support site.
To ensure that the end user of the machine will be able to log in successfully, they must be a member of a RAv3 group where Advanced Networking is enabled.
The IP addresses which the user will need to access must be defined as described under the heading Configuring Advanced Networking settings.
It is also essential that the Pre-login functionality is enabled via the RAv3 configuration settings.
This is found under the Network tab of each RAv3 group.
To switch on this setting, select or create a RAv3 group for the users needing this functionality.
Select the Networking tab.
Tick Enable advanced networking for this group.
Define the relevant IP addresses.
Under the Pre-login configuration heading, tick the box to Allow all users to connect directly to school domain.
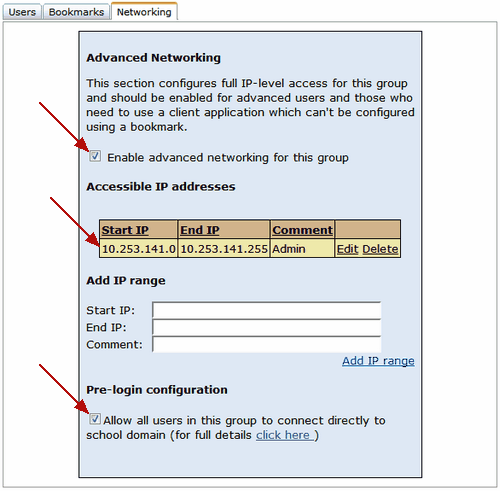
Please note: if you were already using this functionality without having specifically enabled it, it may now need to be enabled for the relevant user group for it to continue working.
Configuration
To configure each device, the administrator will need to log into the device and install the Cisco AnyConnect SSL client.
The administrator will need to be in a RAv3 group where "Advanced networking" is enabled.
The administrator should log into the device and visit the RAv3 website (https://rav3.lgfl.org.uk). Under the AnyConnect tab, you will need to download and install the Cisco AnyConnect client.
Once the AnyConnect client is installed on the machine, the following needs to be done:
(It is presumed you are logged into the machine in question)
Launch the Cisco AnyConnect Secure Mobility Client from the Start menu.
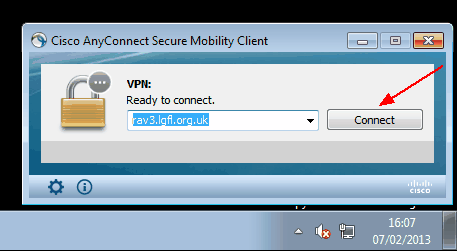
The rav3.lgfl.org.uk setting will already be configured in the client.
Click Connect and enter your USO username and password (with OTP code if you use one).
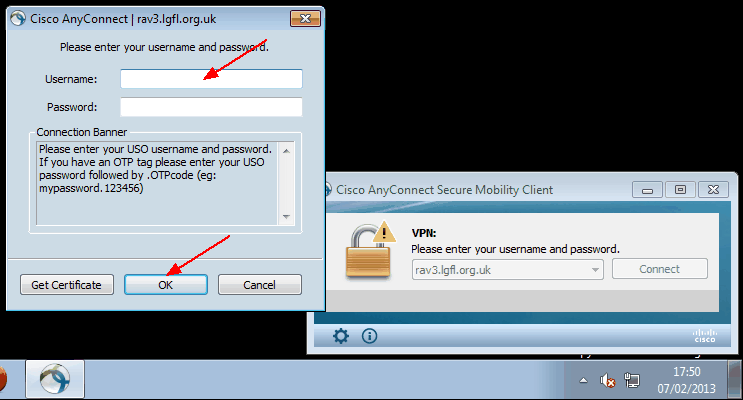
Once the connection is established successfully, the Cisco client will disappear from view.
Launch it again from the Start menu.
Click on the cog icon in the lower left corner of the Cisco AnyConnect window.
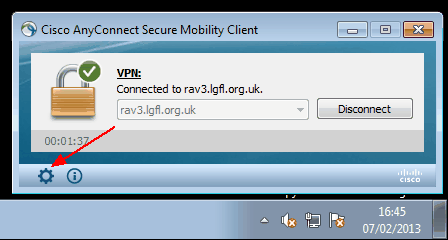
When a pop-up window opens select the Preferences tab if it is not already the one selected.
Tick the first tickbox called Start VPN before user logon to computer.
Please leave the other boxes as they are unless you are confident you fully understand the effect changing the settings will have.
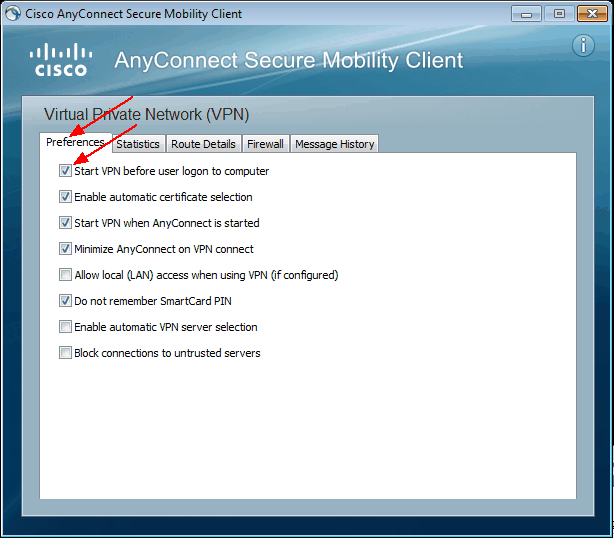
Close the pop-up. Done.
You can now log off the machine.
The next time a user wishes to log onto the machine, the pre-login screen should show an additional networking symbol in the lower right corner of the screen, next to the Off button.
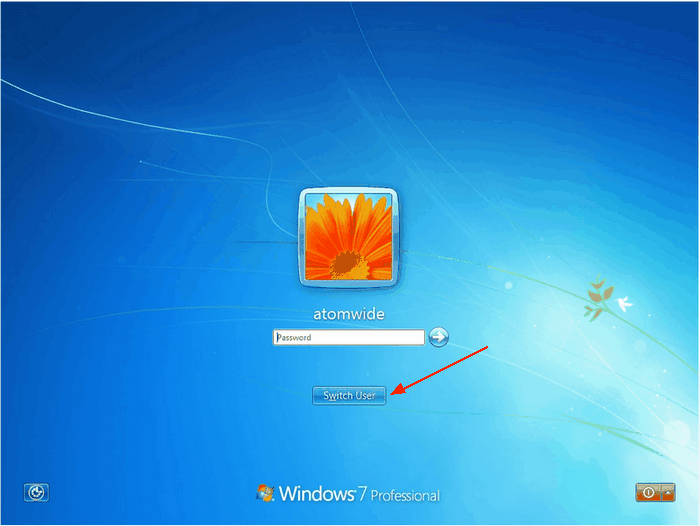
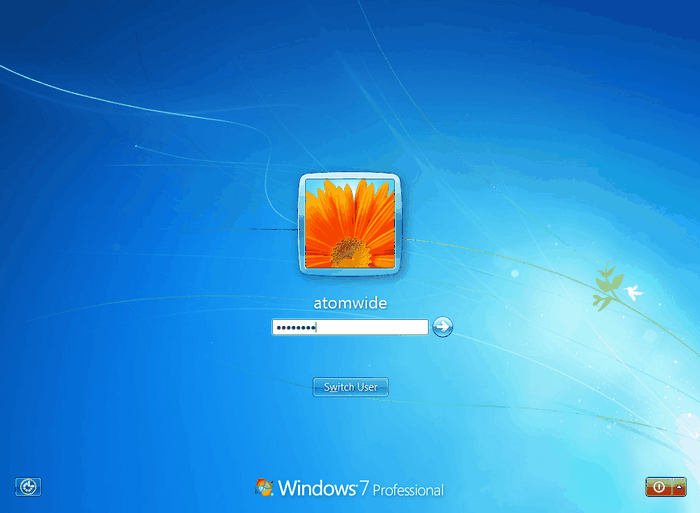
If there is only one account registered on the machine the networking symbol does not always appear automatically.
To get the symbol to show simply click on the switch user button to be taken to the relevant page with the symbol.
If the machine has several accounts registered on it, the networking symbol will appear automatically in the lower right corner.
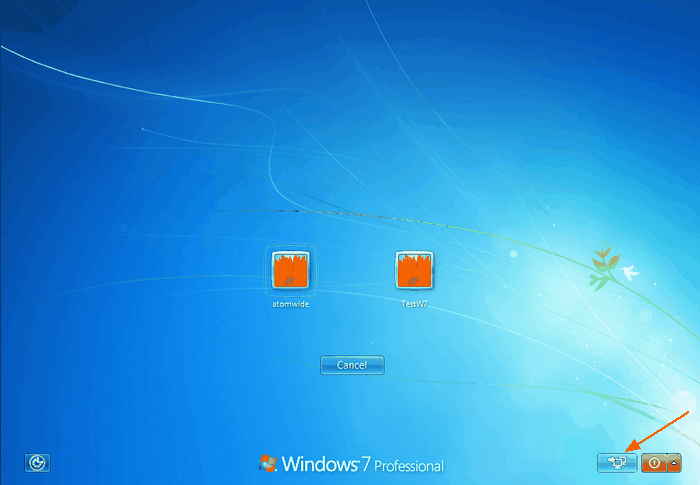
Click on the Networking symbol first before logging on to Windows.
You will now be asked to connect to the school network with your USO username and password (and possibly OTP code). Enter your details and click OK.
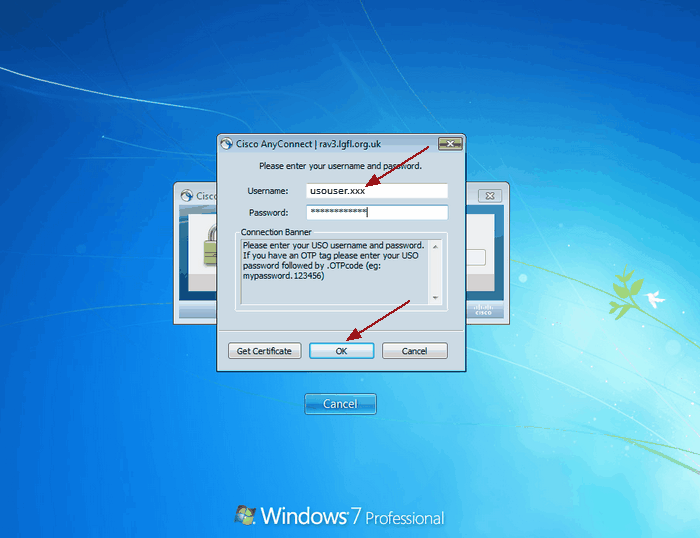
Once a connection to the school's network has been established, this is indicated again in the lower right section of the screen (a Disconnect button will appear - indicating that the VPN is currently connected).
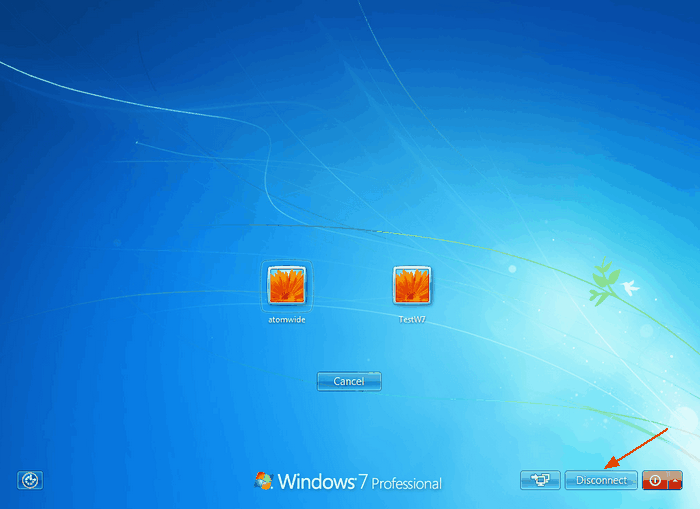
You can now log into your domain with your usual credentials (these may or may not be the same as your USO account if USOSync is used).
Once you've logged into Windows a small pop-up will appear in the lower right corner of the screen confirming you're connected to the school's network via VPN.