First, your school's Head or Headteacher Proxy needs to grant consent for the school's data to be exported and processed.
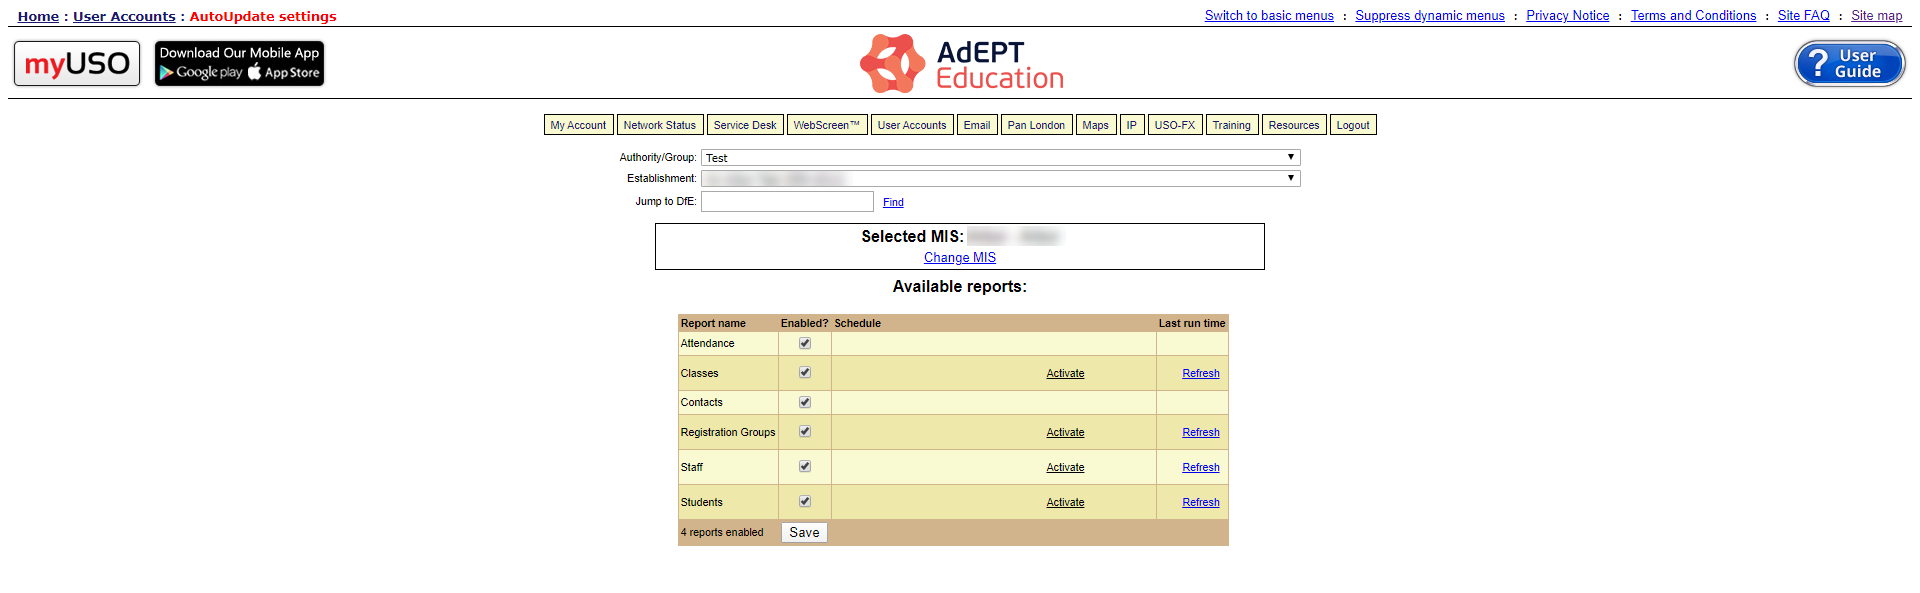
This should be done before any other action is taken by visiting the USO Support Site and selecting User Accounts >> AutoUpdate Settings.
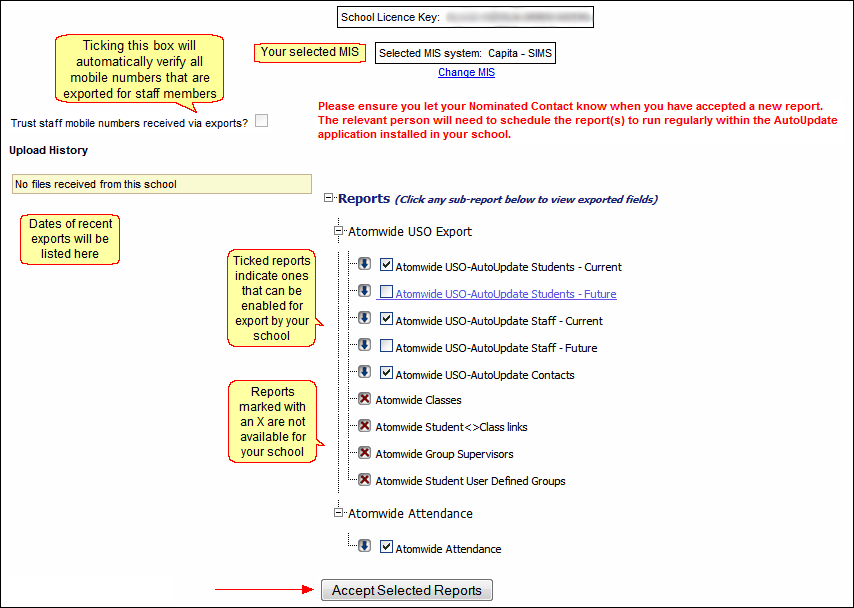
The reports visible on the screen will be the ones available to your school based on your MIS package. They will be marked with an arrow to let you know that they can be accepted by the Head.
The Head should tick the box next to each relevant report and then click the Accept Selected Reports button to indicate agreement to export this data. Please note that whilst a Nominated Contact has access to this page, the "Accept" button is only available to a Head or Head Proxy.
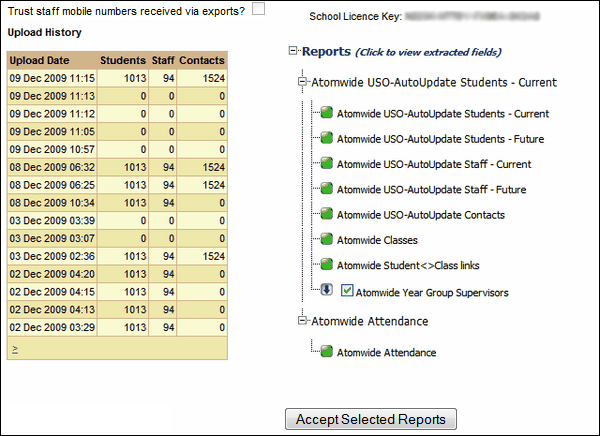
After reports are accepted they are marked with a green square. This means the technician can take the next action to install the software and schedule the data to be regularly exported.
The settings page can be configured either before or after AutoUpdate software is installed though it is recommended that the settings are accepted prior to software installation. This is only intended to simplify the process and will not affect functionality in any way.
If the AutoUpdate software has been installed on your server before the Head consents to the data exports, the "installation completed" screen will state that all exports are disabled until accepted by the Head Teacher or a Headteacher proxy through the USO Support Site.
If software is not yet installed and the settings are configured first, you will be able to run reports and set scheduled tasks as part of the installation process.
The Headteacher or Proxy will need to log in and review the page at https://support.atomwide.com/secure/user/au/au_settings.aspx
The following information will be displayed:
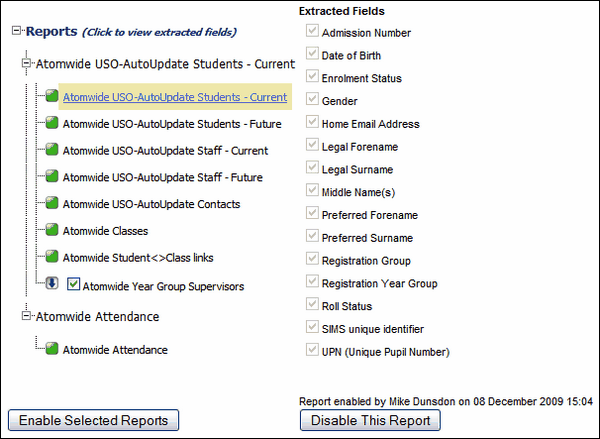
•the licence key for your AutoUpdate software (for easy reference if needed) •a history of data exports will be listed under Upload History (on the left) once exports have begun •reports (accepted, available to be accepted and not available) Please note that the number of reports available depends on your MIS type and the image below illustrates reports associated with SIMS.
All reports that are available for export are ticked by default (and marked with a blue downward arrow). To accept these settings, a Head Teacher needs to tick the box next to the relevant report and then click the Accept Selected Reports button. Once accepted, the buttons of the accepted reports will turn green.
If you want to accept some reports but not others you will need to untick the box next to those reports before clicking the Accept button.
When exports are running successfully, all accepted reports are marked with a green button to indicate that they are switched on. Reports marked with a blue arrow and a tick box are available but are not currently accepted for export.
To obtain details on which data fields get exported with a particular report, click on the name of the report to display the information.
The selected report will be highlighted (see image below). The exported fields shown in the right side of the screen will be greyed-out as they are read-only.
When a report is selected, the button Disable This Report will appear below the column listing the extracted fields. This action can also be performed only by a Head Teacher or designated proxy. Disabling certain reports will prevent the AutoUpdate process from working so you must be absolutely certain you want to disable it.
Above the Disable button will be the name of the person who accepted the report to run. If your school has been running AutoUpdate for some time this name is likely to be of an Wavenet Education staff member.
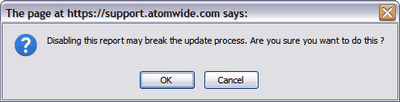
Should you click on Disable This Report accidentally, a warning message asking you to confirm the action will appear and allow you to Cancel the action if it was unintended.
 Please note schools using Groupcall will not be able to manage data exports using this interface. Please note schools using Groupcall will not be able to manage data exports using this interface.
To create a schedule for any accepted reports in SIMS please see AutoUpdate configuration instructions for this MIS.
To create a schedule for any accepted reports in Wauton Samuel please see AutoUpdate configuration instructions for this MIS.
Trusting staff mobile numbers
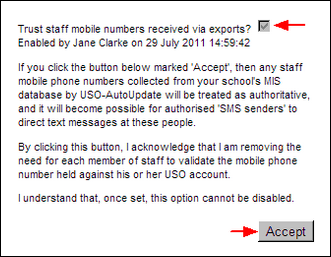
As well as accepting the reports the Headteacher can also Trust staff mobile numbers by ticking the appropriate box.
Trusted mobile numbers are listed as verified on a person's USO account. These numbers can then be used to send text reminders to staff, for example if they need a password re-set.
These reminders are only sent when requested but are only available for verified numbers.
To verify all staff mobile numbers the Headteacher will need to tick the box and then click Accept.
Please note that enabling this will only verify mobile numbers for staff that are exported from the MIS. Mobile numbers that are manually added to an account will need to be manually verified.
|