When installation is complete, access the start menu and go to Start > Programs > Atomwide Ltd > USO-AutoUpdate. This folder contains three options. Choose USO-AutoUpdate.

This will open the USO-AutoUpdate software for configuration purposes.
To obtain your licence key go to the support site then select User Accounts >> AutoUpdate Settings. The licence key will be displayed at the top of the page.
Configuring software settings
Before any data can be exported, AutoUpdate needs to be correctly configured.
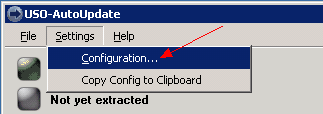
Click on Settings then select Configuration.
When the dialogue box opens, enter your Licence key. This is found on the AutoUpdate Settings page of the support site but will only become visible after the Head has logged in and selected your MIS type.
The Wauton Samuel tab will not appear until after the licence key has been entered, identifying your MIS as Wauton Samuel.
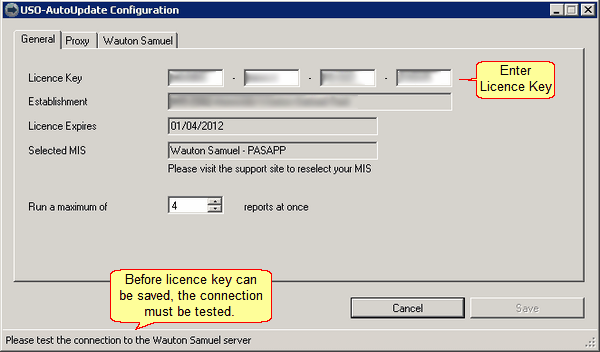
The Save button is not yet active. Before you can save the Licence Key you've entered you need to test the connection to the Wauton Samuel server.
To test the connection, click on the Wauton Samuel tab.
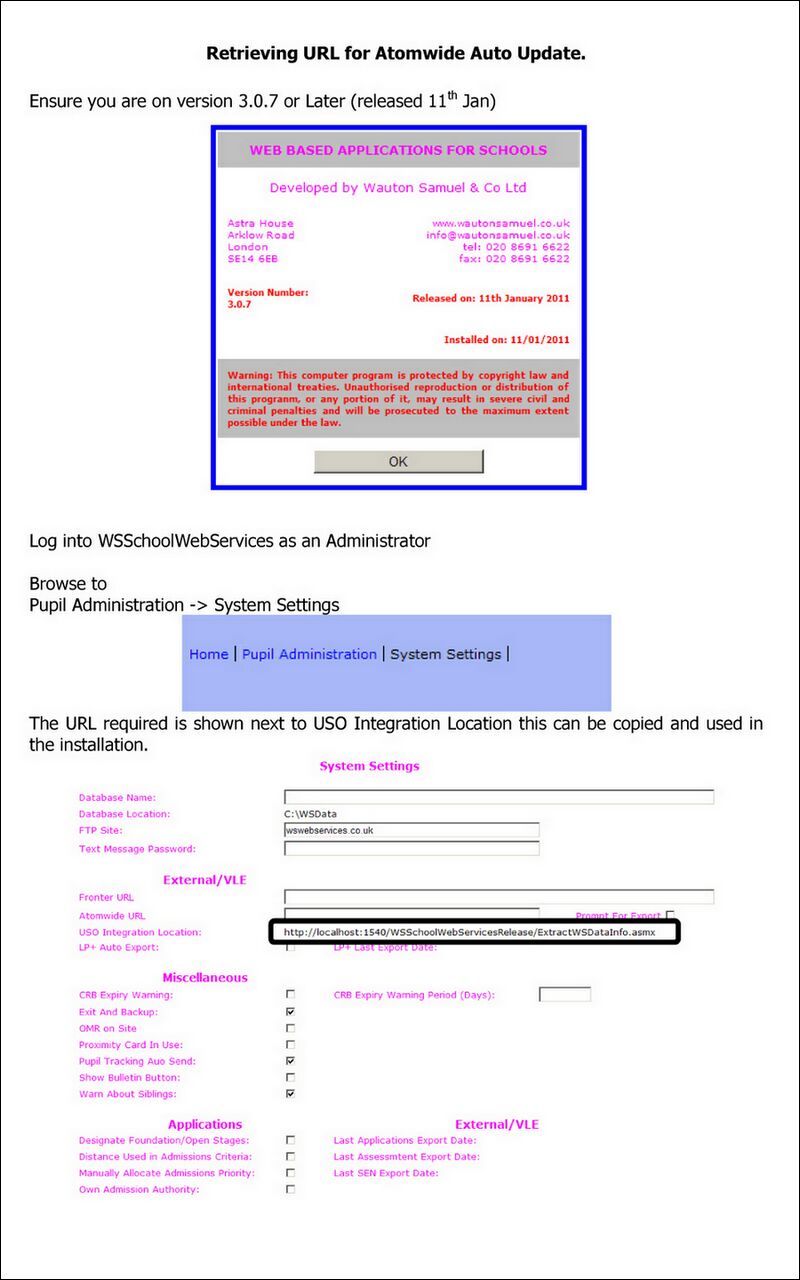
Enter the Web Service URL. This can be found in the Wauton Samuel documentation.
 Click here to view sample document
Then enter the password. You will need to contact Wauton Samuel to obtain this.
Click the Test Connection button.
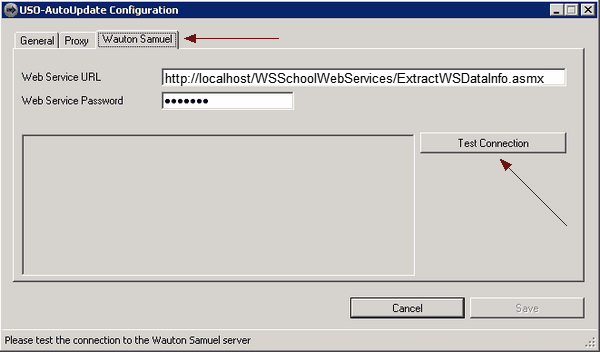
You should now see that the Save button has become active. Click Save and close the interface.
Set-up
The program interface displays a set of coloured indicators, which show the current status of the installation and whether there are any
problems (i.e. Red for major problems, yellow for processing/in progress, green for OK). If the indicator turns green that shows it can connect correctly to Wavenet Education's servers.
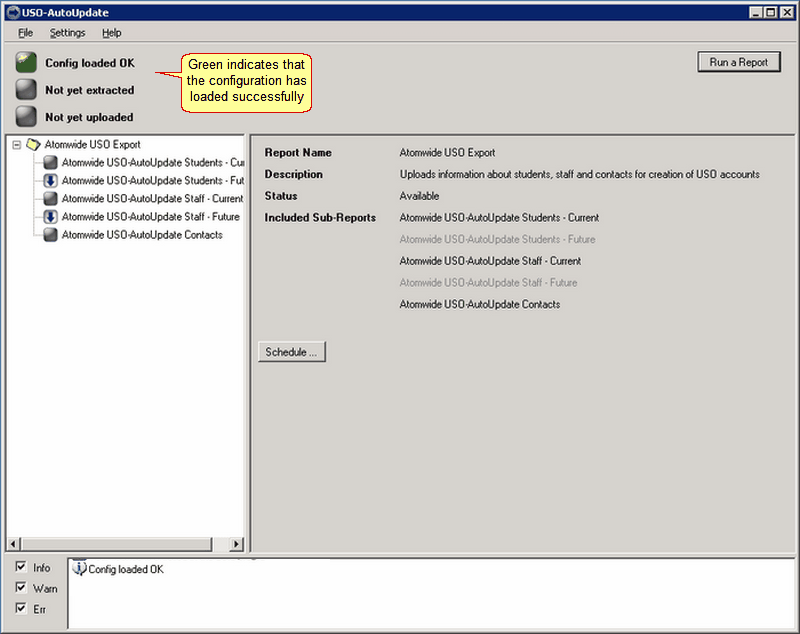
Data exports already accepted
If exports have already been accepted by the Head Teacher, the accepted reports will be indicated by a grey square on their left. Available reports that have not yet been accepted are indicated by a blue arrow. Reports that are not available to your school are indicated by a red cross and cannot be accepted.
Data exports not accepted
If no data exports have been accepted via the support site, you will see a blue arrow next to the name of each sub-report until exports are accepted.
You will also have to carry out the activation process at this point to obtain the licence key for entering in the software before any further steps can be taken. Please see the information at the top of this page which describes how to carry out the configuration process.
Preparing the first data export
If the activation process was carried out prior to installation, the AutoUpdate application needs to be re-started for the changes to be visible.
The main reports are marked with a folder icon. The reports contained within each folder are sub-reports of the main report. A certain number of sub-reports is mandatory as without these AutoUpdate will not provide enough basic data for USO accounts.
All sub-reports that have been accepted via the support site will be marked with a grey square.
Any sub-reports marked with a blue arrow are available but have not yet been accepted.
Any sub-reports marked with a red cross are not available to your school. These cannot be accepted.
Click on a report folder to see the sub-reports available within it. Selecting any sub-report (by clicking on it) will show the fields that comprise it. These will be displayed in the right-hand pane (see below) and will show which fields are being exported.
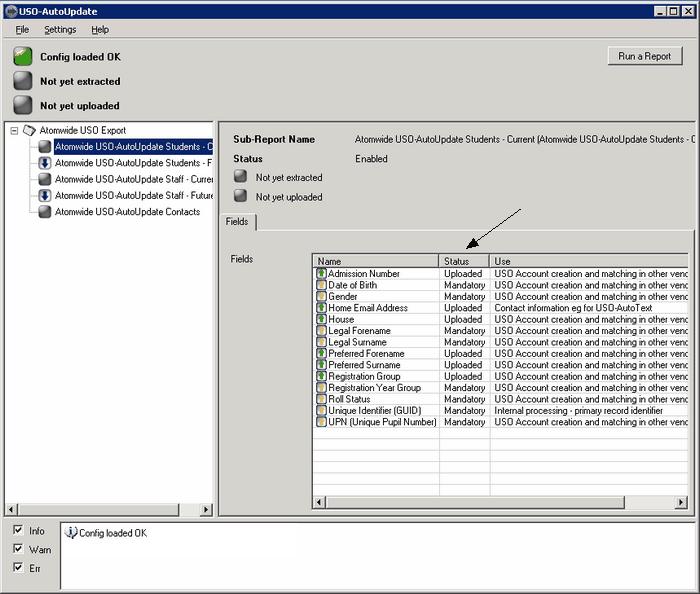
Explanation of the "Status" fields:
•Mandatory fields - column must be present in order for the sub-report data to be used in USO account creation and maintenance.
•Uploaded fields - optional data fields that have been accepted by the school when reports were accepted. These should contain data in Wauton Samuel but if no data is found in these fields it will not prevent account creation or maintenance.
•Not Uploaded fields - optional fields that the school has opted out of. A school can request to opt out of exporting certain fields by raising a support case with the Service Desk.
Running a test
You will now be able to run a test to ensure data is being correctly extracted from Wauton Samuel. The test will not send any data to Wavenet Education, it will just allow you to make sure all the relevant fields are being extracted and to see the information they contain.
To do this, select (ie highlight) the Atomwide USO Export report in the left pane. Then click the Run a Report button in the top right corner. This will run all the sub-reports that the report contains.
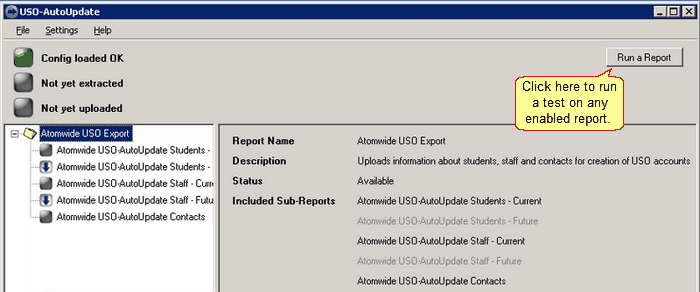
This will open a Report Wizard which will allow you to select the report you want to run.
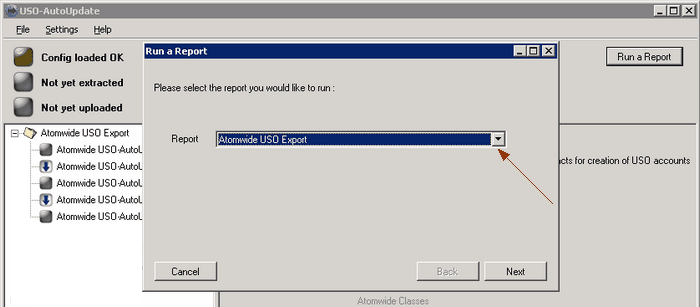
Select a report from the dropdown menu and click Next.
Select whether you just want to test the data extract or whether you want to upload it as well. Click the relevant radio button.
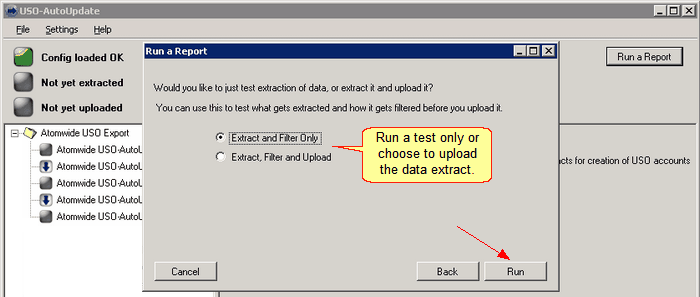
Click Run to proceed.
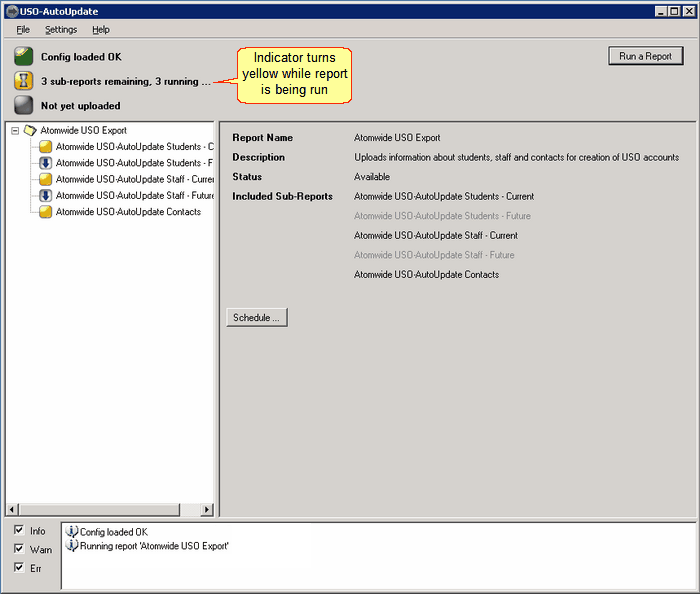
The status indicators will turn yellow while a report is being run.
Each of the selected reports will be extracted and put through a verification process. Errors, warnings or status messages will be generated for each one so any problems can be identified and addressed. These messages will be shown in the horizontal pane at the bottom of the interface.
If everything is working correctly all indicators will turn green.
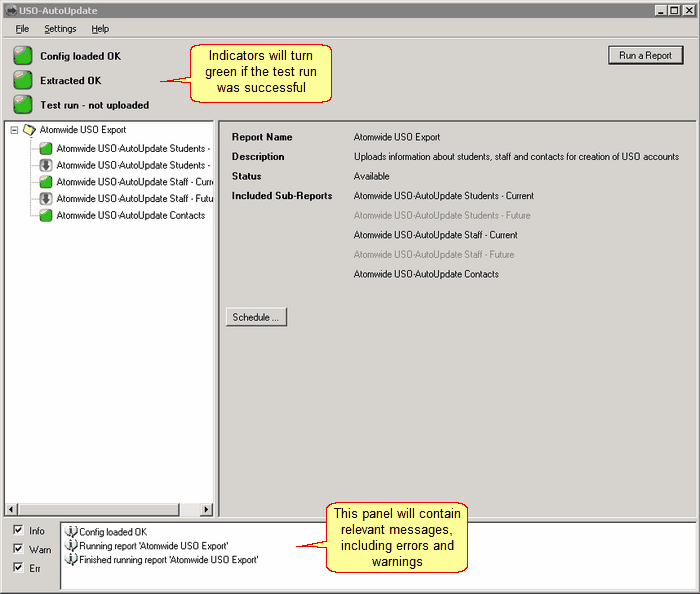
 Errors will be generated if a required column is missing from a sub-report. This will prevent that sub-report from being exported. A warning will appear if a non-mandatory column of data is blank or no rows are returned. See the Common Errors section for details on resolving these.
Exporting real data
After performing a test extract and ensuring there are no errors, you can run a real data export.
Simply perform the steps described in the section above after selecting the Extract, Filter and Upload option in the Report Wizard.
It is recommended that the first data export is done manually. This will extract data and upload it to Wavenet Education to ensure that all the fields are exported correctly.
Status messages will show which report(s) contains a problem and the nature of that problem. You will need to click on the specific report and check the specified fields.
Assuming this export is successful, you will be need to schedule future data exports to run automatically.
If the export is unsuccessful, you will need to resolve any issues before automated exports can be scheduled. See the Common Errors section for help with troubleshooting.
Setting up scheduled tasks
Once the reports have run correctly, a scheduled task will need to be set to repeat the exports regularly. Each report needs to be scheduled individually.
Select a report by highlighting it. Press the Schedule… button.
A scheduling dialogue box will appear (as shown below).
Select the days and set the time for the reports to run. Please ensure that the time is as early in the evening as possible.
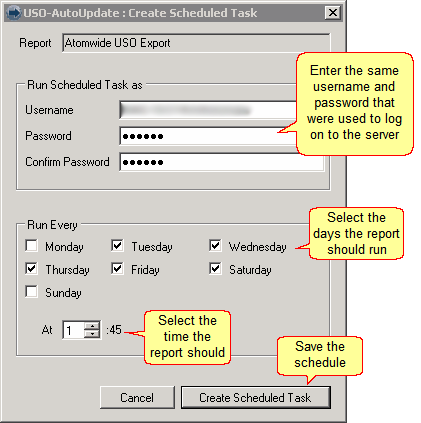
Tasks must NOT be scheduled to conflict with back-ups or set at times when the server is off.
Click Create Scheduled Task when ready. The following message will be shown.
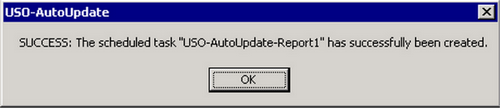
That’s it! Setup completed.
See also: