The Document Exchange function in eAdmissions allows eAdmissions users to send documents securely to other users.
When you select this page you will see the following interface.
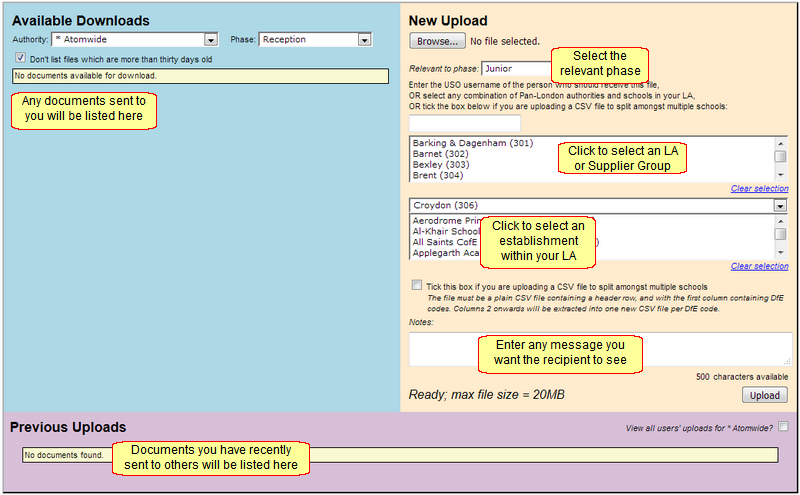
Files you have received
If you have been sent any files by other users, they will be listed down the left-hand side.
You can choose to display all files you've ever been sent or you can tick the box to list only the ones that are less than 30 days old.
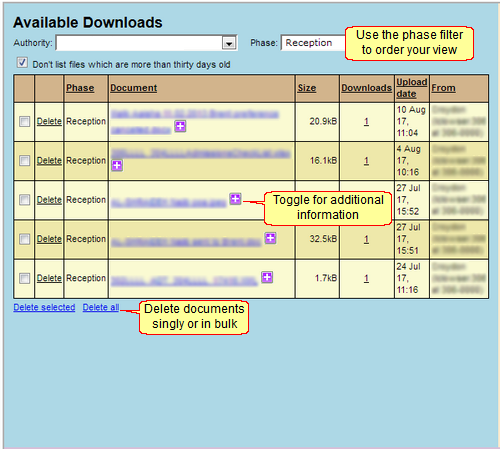
To filter long lists, apply the "Phase" filter to the right of your LA name.
To view additional information regarding each file, click on the purple "+" button to open the description.
You can download individual files by right-clicking the document name and then selecting Save as... from the menu. Make sure you save the file in the appropriate folder on your computer or network.
You can then delete individual files by clicking Delete next to a specific file name. Alternatively, use the tick box to select multiple files and delete the selected files in batches.
Alternatively, you can select several or all files and either click Delete selected or Delete all to clear the list.
Sending files
To send files to other eAdmissions-related staff use the New Upload side of the interface.
If you have arrived at the Document Exchange by asking to send attachments from the Application Search page, the the file section will be pre-completed.
Click Browse and find the file on your computer or shared drive.
Select a Phase from the menu.
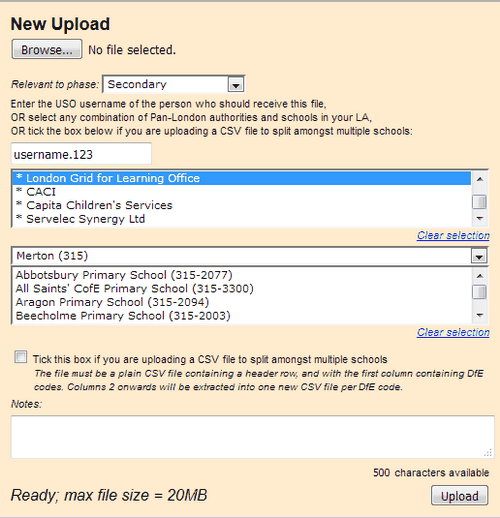
If you know the USO username of the person you want to send a file to, enter their username, along with the LA suffix, into the box. Make sure you have entered the username correctly. You can find the USO username of eAdmissions users via the User Administration page.
You can send a file to any user with a USO account by entering a username. The recipient must be an eAdmissions user.

If you need to send it to an LA or Supplier Group, click on the LA or Supplier name to select it. Use the arrows to scroll down the list.
If you have selected a group but then wish to de-select it, click Clear selection below the box.

If you need to send the file to another establishment within your LA, click on the required option in the list to select it.
If you have selected a group but then wish to de-select it, click Clear selection below the box.

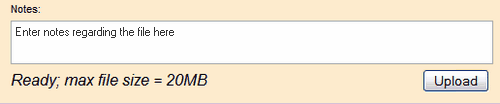
You have the option to write a note to the recipient(s) regarding the file. Enter text in the Notes box provided.
You can send documents to more than one group at a time by holding down the Ctrl button and selecting all relevant LAs or Schools.
Alternative document sending method
It is possible to avoid having to select recipients by uploading a file differently.
You can instead, create a CSV file where the first column (column A) contains the DfE code of the establishment needing the information.
The rest of the line, after the DfE code, can contain the relevant data you need to provide.

When this type of file is uploaded, it will be processed by the system and split up in a way that ensures each establishment receives only the bit of information that is relevant to them.
Whichever process is used, click Upload to send the file and complete the process.
You will see an "Upload succeeded!" message when your document has been sent successfully.

The recipient(s) will receive an email notification informing them that a new file is available.
Files you have sent previously
Any files you have previously sent to others will be listed at the bottom of the main screen.

You can delete individual files by clicking Delete in the right-hand column.
If you have a list of files, you can select several or all files and either click Delete selected or Delete all to clear the list.
You can also amend either the phase or the notes on a previously sent file by clicking Edit to the left of it.

The Phase and Notes fields will turn into editable text boxes where you can select a different option or enter new text.
When finished, click Update on the left.
Please note: the phase associated with the file and the notes will change for all the recipients when they next view their list of files but no email notifications will be sent out regarding such changes.
You can see when and by whom your document was downloaded by clicking the underlined number in the Downloads column.